How to Schedule Instagram Reels in 2026 (Step-by-Step)


Yes—you can schedule Instagram Reels. In 5 minutes, I'll show you how to schedule Reels from desktop using Meta's free scheduler or a faster third-party tool, plus the best times and common pitfalls to avoid.
If you're serious about Instagram growth, you need to post Reels consistently—3 to 5 times per week at peak times (7-9 AM, 12-1 PM, 7-9 PM). Manually posting each Reel, especially when you're filming in batches, is time-consuming and leads to inconsistent publishing.
The solution? Learn how to schedule Instagram Reels in advance. In this guide, I'll show you how to batch schedule Reels using Meta Business Suite (Instagram's native scheduler) and third-party tools that unlock advanced features like cross-platform posting, analytics, and bulk upload.
Looking to schedule regular feed posts, carousels, or Stories? Check out our guide: How to Schedule Instagram Posts for non-Reel content.
Schedule across all platforms: Use our social media scheduler to manage Instagram, TikTok (via our TikTok scheduler), YouTube, LinkedIn, Facebook, X, Threads, and Pinterest from one dashboard.
TL;DR
- Yes, you can schedule Instagram Reels using Meta Business Suite (free) or third-party tools
- Schedule from desktop using Meta Business Suite or mobile/desktop with advanced tools
- Third-party tools let you batch upload 10-20+ Reels, post to all social media at once, and see a unified calendar
- AI-powered scheduling auto-generates Reel captions, suggests trending hashtags, and optimizes posting times
- Best times to post Reels: 7-9 PM (highest engagement), 7-9 AM, 12-1 PM in your audience's timezone
- Batch scheduling Reels saves 5-10 hours per week for consistent creators
Quick Jump Links
- Can You Schedule Instagram Reels? (Yes—Here's How)
- How to Schedule Instagram Reels From Desktop (Free)
- Schedule Reels Without Creator Studio (Third-Party Tools)
- How to Schedule Instagram Reels (Step-by-Step)
- Instagram Reels Cover Image Best Practices
- Best Times to Schedule Instagram Reels
- Troubleshooting: Why My Scheduled Reel Didn't Post
- FAQs: Scheduling Instagram Reels
Watch: Schedule Instagram Reels in 60 Seconds
Watch our quick demo: Batch upload Instagram Reels and schedule them with optimal posting times
Batch scheduling 10 Reels in one session saves 5-10 hours per week — and keeps your posting cadence consistent enough to stay in the algorithm's good graces. Start your free trial →
Why Schedule Instagram Reels?
According to Sprout Social's research and the latest Instagram statistics, brands that post Reels consistently (3-5 times per week) see 2-3x higher engagement rates than sporadic posters. But creating and manually posting Reels daily burns you out fast.
Scheduling Instagram Reels in advance solves this by letting you:
- Batch your content creation: Film 10-15 Reels in one session, then schedule them for 2 weeks
- Post at optimal times: Your Reels go live at 8 PM even if you're asleep or in meetings
- Maintain consistency: Never miss a posting day because you're busy, traveling, or out of ideas
- Reduce decision fatigue: Plan your Reels calendar once per week instead of scrambling daily
- Focus on quality: Spend less time on logistics, more time on hooks, editing, and engagement
For creators posting 3-5 Reels per week, batch scheduling saves 5-10 hours weekly. That's 40+ hours per month you can reinvest in content quality, DM responses, or monetization strategies. A dedicated social media scheduler makes this process effortless.
Learn more about social media scheduling strategies.
Can You Schedule Instagram Reels? (Yes—Here's How)
Yes. Meta Business Suite (formerly Facebook Creator Studio) supports scheduling Instagram Reels, but with limitations:
- Must upload pre-recorded Reels (can't use in-app editing)
- Vertical video format (9:16 ratio) required — see our Reels aspect ratio guide for safe-zone tips
- Up to 90 seconds length (though 7-30 seconds perform best)
- Can add caption, hashtags, and cover image
- Cannot add Instagram music or trending audio (these are app-only features)
Workaround: Edit your Reel in the Instagram app with trending audio, export it, then upload to Meta Business Suite for scheduling. The audio is baked into the video file. If you don't have original footage, you can use high-quality free stock video for your background.
Third-party tools like PostEverywhere work the same way but add batch upload, cross-platform posting, and unified calendars.
How to Schedule Instagram Reels From Desktop (Free)
Instagram's native scheduler is called Meta Business Suite. It's free and supports scheduling Instagram Reels from your desktop. If you want to publish immediately instead of scheduling, see our guide on how to post Instagram Reels from desktop.
Requirements:
- Instagram Business or Creator account (switch in Settings → Account Type)
- Link your Instagram to a Facebook Page (required for Meta Business Suite)
Steps to Schedule Instagram Reels From Desktop:
- Open Meta Business Suite on desktop
- Click Create post in the top menu
- Select Instagram as the destination (or Instagram + Facebook for cross-posting)
- Upload your Reel:
- Click Upload or drag-and-drop your video file
- Video must be vertical (9:16 ratio, 1080x1920 resolution)
- File size: up to 100MB
- Duration: up to 90 seconds (optimal: 7-30 seconds)
- Select Reel as the post type
- Add your caption (up to 2,200 characters)
- Add hashtags (3-5 recommended, e.g., #reels #instagramreels #contenttips)
- Choose or upload a custom cover image (more on this below)
- Add location tag (optional, helps with local reach)
- Click Schedule (instead of "Publish now")
- Select date and time (can schedule up to 75 days ahead)
- Click Schedule
Your Reel will auto-publish at the selected time.
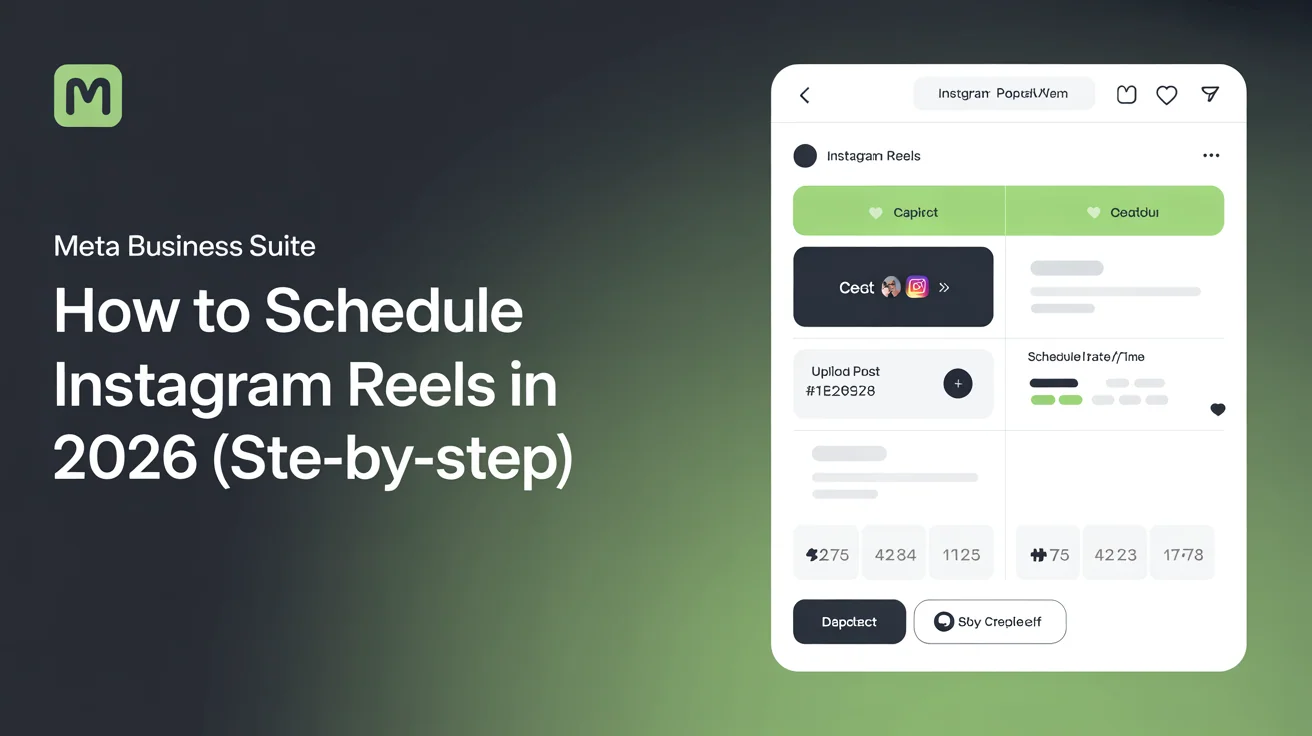 Meta Business Suite's free Instagram Reels scheduler interface for desktop scheduling
See Instagram's official scheduling guide for more details.
Meta Business Suite Limitations
- One Reel at a time: No batch upload—you must schedule each Reel individually
- 75-day limit: Can schedule up to 75 days ahead (longer than TikTok's 10-day limit)
- Desktop-only: Must use Meta Business Suite on desktop browser (Instagram app has very limited mobile scheduling)
- No trending audio: Can't access Instagram's trending audio library when scheduling Reels
- No unified calendar: Can't see Instagram + TikTok + YouTube Shorts in one view
- Limited analytics: Basic insights only; no cross-platform performance comparison
For creators posting 1-3 Reels per week, Meta Business Suite works fine. But if you're posting 5+ Reels weekly across multiple platforms, you need a third-party tool.
Schedule Reels Without Creator Studio (Third-Party Tools)
Third-party Instagram Reels schedulers unlock features Meta Business Suite can't match:
Key advantages:
- Batch upload: Upload 10-20 Reels at once, schedule them in one session
- Visual content calendar: See your entire Instagram Reels, TikTok, YouTube Shorts, and Facebook Reels calendar in one view
- Cross-platform posting: Upload once and auto-post to Instagram Reels, TikTok, YouTube Shorts, and Facebook Reels simultaneously
- Mobile app: Schedule from your phone while filming content on-the-go
- Advanced analytics: Track best posting times, engagement patterns, and cross-platform performance
- Team collaboration: Multiple team members can schedule, approve, and manage content
- Caption templates: Save reusable caption templates with branded hashtags (or generate fresh ones with the AI caption generator)
- First comment scheduling: Auto-post a first comment with links or additional hashtags
Popular third-party Instagram Reels schedulers include PostEverywhere, Buffer, Later, and Hootsuite.
PostEverywhere stands out because it's built for creators who need to post Instagram Reels, TikTok videos, YouTube Shorts, and Facebook Reels from one workflow—perfect for maximizing reach without duplicate work.
Learn more about cross-platform publishing.
Instagram Reels Scheduler: Meta vs Third-Party (Comparison Table)
| Feature | Meta Business Suite (Free) | PostEverywhere (Paid) |
|---|---|---|
| Schedule Reels | ✅ Yes | ✅ Yes |
| Batch upload | ❌ No (one at a time) | ✅ Yes (10-20+ Reels at once) |
| Scheduling limit | 75 days ahead | 6 months ahead |
| Desktop access | ✅ Yes | ✅ Yes |
| Mobile app | ❌ Very limited | ✅ Full scheduling |
| Visual calendar | ❌ No unified view | ✅ Yes (multi-platform) |
| Cross-platform posting | ❌ Instagram + Facebook only | ✅ Instagram, TikTok, YouTube, Facebook |
| Analytics | Basic insights | ✅ Advanced (cross-platform comparison) |
| Best-time suggestions | ❌ No | ✅ Yes (AI-powered) |
| Team collaboration | Limited | ✅ Yes (roles, approvals, permissions) |
| Caption templates | ❌ No | ✅ Yes (reusable, branded) |
| First comment scheduling | ❌ No | ✅ Yes (links, hashtags) |
| Trending audio | ❌ No | ❌ No (edit in-app first, then export) |
| Unified calendar (all platforms) | ❌ No | ✅ Yes |
| Cost | Free | $19-49/month |
| Best for | 1-3 Reels/week, Instagram-only | 5+ Reels/week, multi-platform creators |
Bottom line: Use Meta Business Suite if you're posting 1-3 Reels per week to Instagram only. Use a third-party scheduler if you're posting 5+ Reels weekly or managing multiple platforms.
How to Schedule Instagram Reels (Step-by-Step)
Here's the exact workflow to batch schedule Instagram Reels:
Step 1: Create Your Instagram Reels
Film 8-15 Reels in one batch session:
- Pick a content theme: Educational, entertaining, trending, or behind-the-scenes
- Film vertical (9:16): Use your phone or camera in portrait mode
- Hook in first 2 seconds: Grab attention immediately to avoid swipes
- Keep it short: 7-30 seconds perform best (up to 90 seconds allowed)
- Edit with captions/effects: Use CapCut, Adobe Premiere Rush, Instagram Edits, or any of the best AI short-form video tools
Pro tip: Film raw footage in batches, then edit later. Filming 10 Reels back-to-back is faster than filming + editing one at a time. According to HubSpot's video marketing research, batch-creating video content improves consistency by 67%.
Export settings for best quality:
- Resolution: 1080x1920 (9:16 aspect ratio)
- Frame rate: 30 FPS minimum
- Bitrate: Highest quality your editing app allows
- Format: MP4 (H.264 codec)
- File size: Under 100MB
Step 2: Open Your Instagram Reels Scheduler
If using Meta Business Suite:
- Open Meta Business Suite on desktop
- Click Create post → Select Instagram → Choose "Reel"
If using a third-party tool:
- Log in to your Instagram scheduling tool
- Navigate to "Upload" or "Composer"
- Select Batch Upload (if available) or upload Reels one-by-one
Step 3: Upload Your Reels
For Meta Business Suite:
- Upload one Reel at a time
- Drag-and-drop or click "Upload"
- Video must be vertical (9:16 ratio)
For third-party tools:
- Drag and drop 8-15 Reels into the uploader
- Videos appear in a queue or list view
- Reorder by dragging
 Batch upload interface: Schedule 10+ Reels in one session with drag-and-drop
Step 4: Add Captions, Hashtags, and Settings
For each Reel, customize:
- Caption: Hook in the first line (shows in feed previews)
- Hashtags: 3-5 relevant hashtags (mix trending + niche)
- Example: #reels #instagramreels #contenttips #creatortips #smallbusinesstips
- Cover image: Choose the most eye-catching frame (or upload custom cover—see section below)
- Location tag: Add location for local reach
- Alt text: Accessibility text for visually impaired users
Pro tip: Save caption templates for recurring content types (or try an AI caption generator to speed things up):
[Hook question or statement]

[3-5 bullet points with value]

Follow @yourusername for more [niche] tips!

#hashtag1 #hashtag2 #hashtag3
Step 5: Choose Cover Images
Cover images are critical—they're the thumbnail people see in your grid and in the Reels tab before they play your video.
See our dedicated section below: Instagram Reels Cover Image Best Practices
Step 6: Set Posting Times
Research from CoSchedule (see alternatives) shows Instagram Reels get highest engagement at:
- 7-9 PM (evening prime time—people watch Reels before bed)
- 7-9 AM (morning scroll before work)
- 12-1 PM (lunch break)
Strategy 1: Consistent cadence Post at the same time every day (e.g., 8 AM and 8 PM daily). This trains your audience to expect new Reels.
Strategy 2: Peak-time targeting Schedule all Reels for 7-9 PM when Instagram Reels usage peaks.
Strategy 3: Test and optimize Rotate posting times for 2 weeks, then analyze which windows get the most views in the first hour.
Use a content calendar to visualize your schedule and avoid gaps.
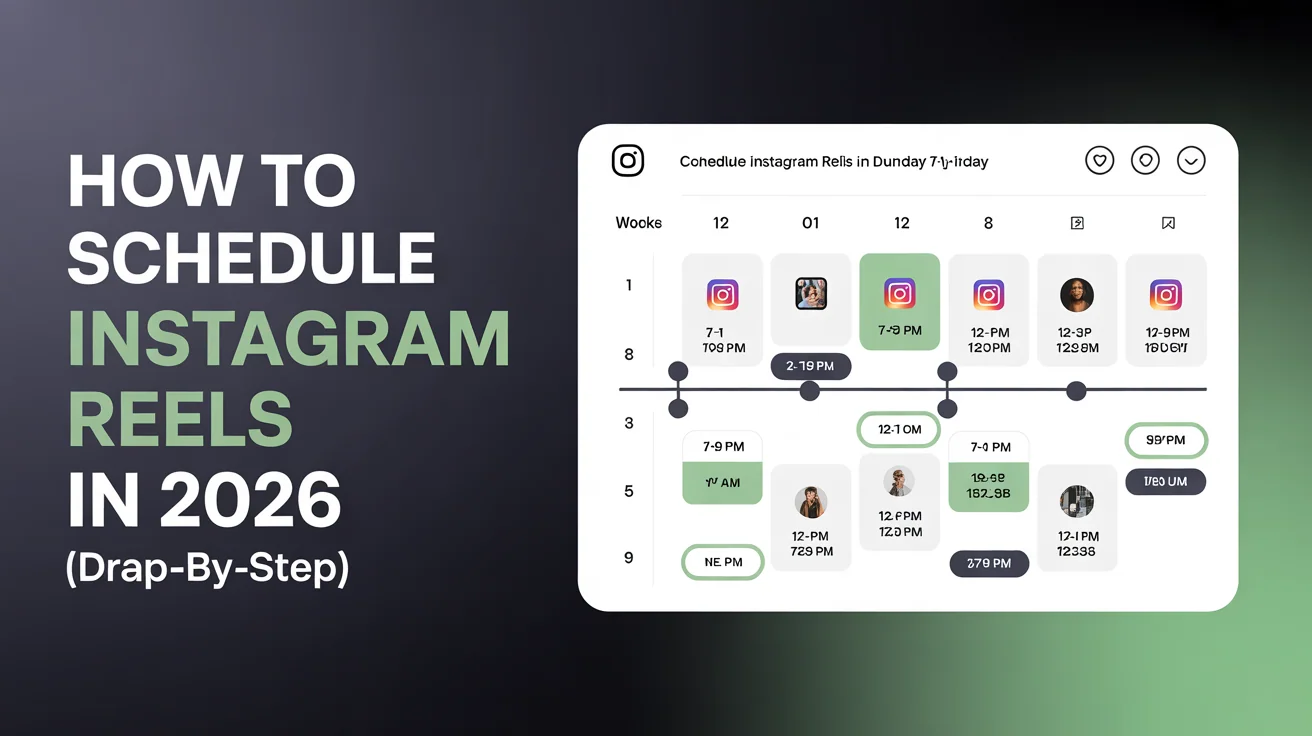 Visual content calendar: See all scheduled Reels at a glance with optimal posting times
Scheduling Reels at 8 PM but accidentally double-posting on Wednesday kills your per-post engagement. PostEverywhere's visual calendar shows your full Reels schedule across Instagram, TikTok, and YouTube Shorts in one view — so you catch gaps and collisions before they happen. Try it free →
Step 7: Review and Confirm
Before finalizing:
- Check your calendar view: Make sure you don't have gaps or double-posts
- Preview each Reel: Ensure captions, covers, and videos are correct
- Verify posting times: Double-check timezones (especially if traveling)
- Hit "Schedule All" (third-party tools) or confirm each individually (Meta Business Suite)
Done. Your Instagram Reels will auto-publish at the scheduled times—no further action needed.
Instagram Reels Cover Image Best Practices
Your Reel cover image (thumbnail) is the first thing people see in your grid and Reels tab. A strong cover increases click-through rates and makes your profile look cohesive.
Why Cover Images Matter
- Grid aesthetics: Cohesive covers create a professional, branded grid
- Click-through rate: Compelling covers increase Reels tab views by 30-50%
- Discoverability: Instagram shows cover images in search results and Explore
How to Choose or Create Cover Images
Option 1: Auto-select from Reel
- Meta Business Suite and most schedulers let you scrub through your Reel and select the most eye-catching frame
- Choose a frame with:
- Clear facial expression (if showing face)
- Readable text (if using text overlays)
- Bright, high-contrast colors
- Centered subject
Option 2: Upload Custom Cover
- Design a branded cover image in Canva, Photoshop, or Figma
- Dimensions: 1080x1920 (9:16 ratio) — see our social media image sizes guide for every platform's cover and video dimensions
- Include:
- Large, readable text (3-7 words max)
- Consistent color scheme/fonts across all covers
- Your face or key visual element
- Brand colors
Pro tip: Create a Canva template with your brand colors and fonts, then duplicate it for each Reel. This ensures a cohesive grid.
Cover Image Design Tips
- Use large, bold text: Make text readable on mobile (60pt+ font size)
- High contrast: Light text on dark backgrounds or vice versa
- Consistent style: Use the same fonts, colors, and layout across all Reels
- Face close-ups: Human faces increase CTR by 20-40%
- 3-7 words max: Keep text short ("How to Schedule Reels" not "How to Schedule Instagram Reels Using Meta Business Suite From Desktop")
- Brand colors: Use 2-3 consistent colors that match your brand
- Avoid clutter: Clean, simple designs perform better than busy covers
Examples of Great Reel Cover Styles
- Bold text + solid background: "5 Reel Hacks" on a bright pink background
- Split screen: Text on one side, your face on the other
- Numbered series: "Tip #1", "Tip #2", "Tip #3" with consistent design
- Before/After: Show transformation or result
- Emoji + text: "😱 Instagram Changed This!" with short headline
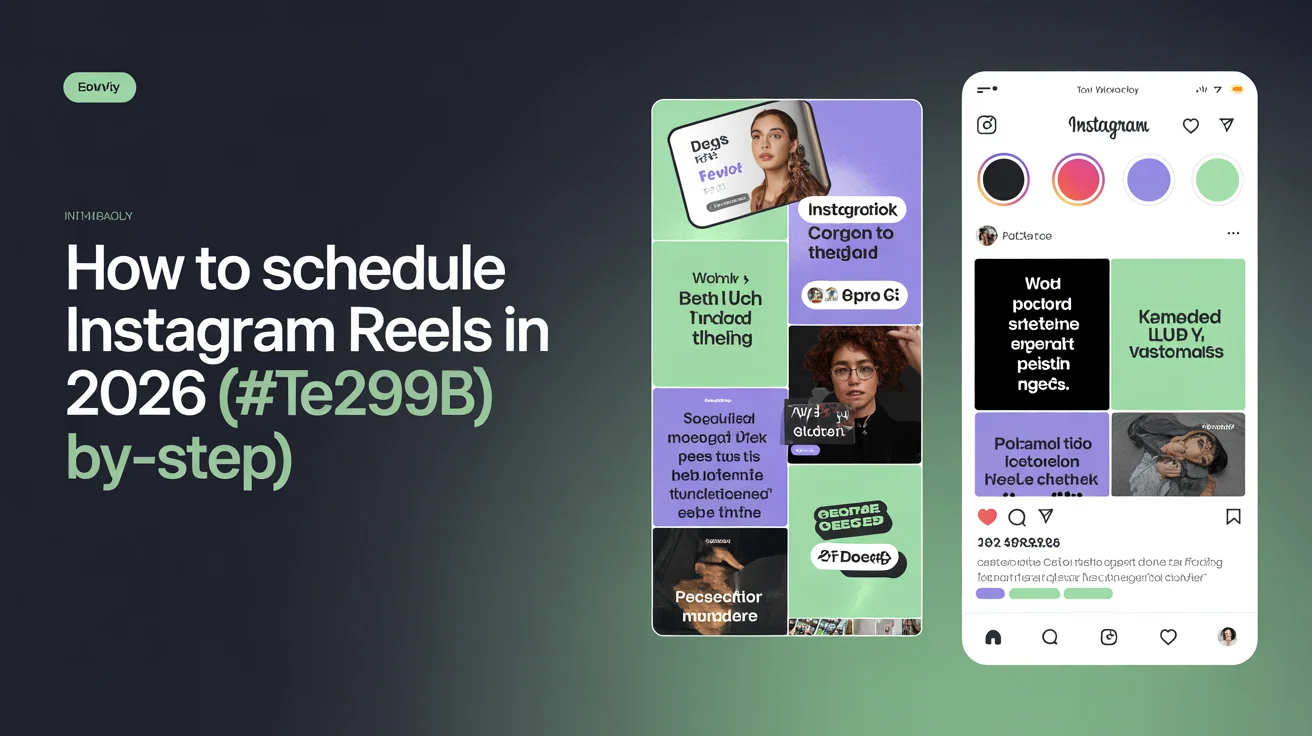 Examples of cohesive Instagram Reels cover images with branded templates
Template resources:
- Canva Instagram Reel Cover Templates
- Adobe Express (formerly Spark)
- Figma community templates
Best Times to Schedule Instagram Reels
According to Influencer Marketing Hub's research, optimal Instagram Reels posting times vary by audience demographics and industry:
General Best Times (US Audience)
| Day | Best Times for Reels (ET) |
|---|---|
| Monday | 7 AM, 8 PM |
| Tuesday | 7 AM, 9 AM, 8 PM |
| Wednesday | 7 AM, 9 AM, 8 PM |
| Thursday | 7 AM, 8 PM |
| Friday | 7 AM, 8 PM |
| Saturday | 9 AM, 8 PM |
| Sunday | 8 AM, 8 PM |
Key takeaway: 7-9 PM is the #1 time for Reels across all days (people watch Reels before bed).
By Industry/Niche
- B2C Brands: 7-9 PM (after work/school)
- B2B/Professional: 7-9 AM and 12-1 PM (workday breaks)
- Fashion/Beauty: 6-8 PM (evening inspiration browsing)
- Fitness/Health: 5-7 AM and 5-8 PM (morning/evening workout times)
- Food/Cooking: 11 AM-1 PM and 6-8 PM (meal planning times)
Pro tip: Use Instagram Insights to analyze when your audience is most active. Go to Profile → Insights → Total followers → See all → Most active times.
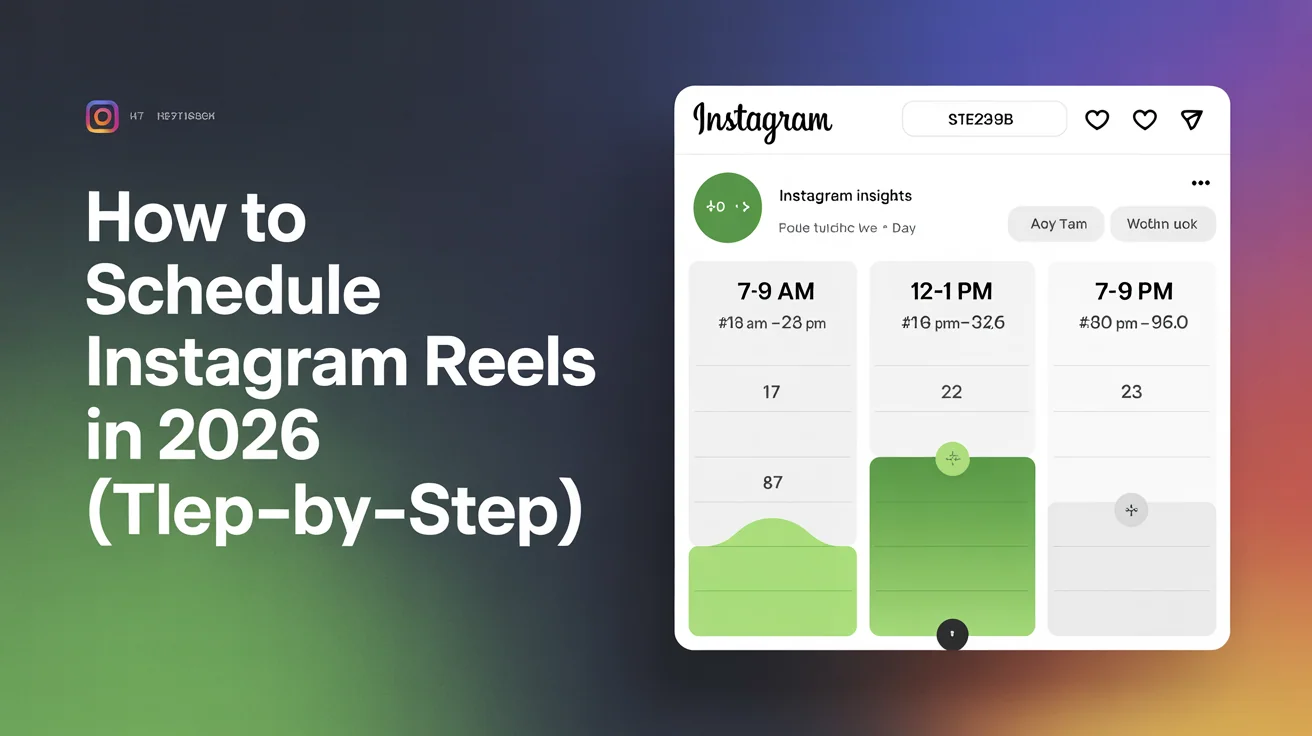 Use Instagram Insights to find your audience's most active times for optimal Reel scheduling
Use smart scheduling tools to auto-select optimal times based on your audience's past engagement.
Read our comprehensive guide: Optimal Time to Schedule Instagram Posts for data-backed timing strategies across all content types.
Instagram Reels Best Practices
1. Post 3-5 Reels Per Week
Instagram's algorithm favors consistent creators. Research from Social Media Examiner shows posting 3-5 Reels per week maintains momentum without overwhelming your audience.
Recommended schedule:
- Monday: 8 PM Reel
- Wednesday: 8 PM Reel
- Friday: 8 PM Reel
- (Optional) Saturday: 12 PM Reel
2. Batch Create Every Week
Film 8-15 Reels in one 2-hour session, then schedule them across 7-14 days. This keeps you consistent even during busy weeks.
3. Hook in First 2 Seconds
The first 2 seconds determine whether someone swipes away or keeps watching. Strategies:
- Pattern interrupt: Surprising visual or sound
- Question: "Want to know how I grew from 100 to 10K followers?"
- Bold statement: "Stop doing [common mistake]"
- Fast movement: Quick cuts, zooms, or transitions
4. Use First-Hour Engagement Boosters
The first hour after posting determines whether Instagram pushes your Reel to Explore. Strategies:
- Schedule Reels when your audience is most active (check Insights)
- Reply to comments within the first 5 minutes
- Share to Stories immediately after posting
- Ask a question in the caption to encourage comments
5. Cross-Post Reels to TikTok, YouTube Shorts, Facebook
Why limit your Reels to Instagram? The same vertical video works on TikTok, YouTube Shorts, and Facebook Reels. Use a cross-platform scheduler to publish everywhere at once. For a complete walkthrough on cross-posting Reels, Shorts, and TikTok at the same time, we've broken down the workflow step-by-step.
Learn how to schedule TikToks and schedule YouTube Shorts to maximize your vertical video reach. If you specifically want your Reel to appear on Facebook Reels too, see our guide on cross-posting Instagram Reels to Facebook Reels without losing the native Facebook reach boost.
Pro tip: Customize captions per platform:
- Instagram: Casual + 3-5 hashtags
- TikTok: Short + trending sound reference
- YouTube Shorts: SEO-optimized title
- Facebook: Community-first tone
6. Save High-Performing Reels to Highlights
If a Reel goes viral, save it to a Highlight so new visitors can discover it. Organize Highlights by topic (Tips, Behind-the-Scenes, Products, etc.).
7. Review Analytics Weekly
Check Instagram Insights to see which Reels performed best:
- Reach: How many unique accounts saw your Reel
- Engagement rate: Likes, comments, shares, saves divided by reach
- Plays: Total plays and average watch time
- Completion rate: % who watched to the end
Create more Reels in the style/format that performs best.
Common Instagram Reels Scheduling Mistakes to Avoid
1. Posting Too Many Reels at Once
Don't schedule 5 Reels to post in one day. Instagram's algorithm may suppress your content if you post too frequently. Space Reels at least 4-6 hours apart.
2. Ignoring Time Zones
If your audience is in EST but you're in PST, make sure your scheduler accounts for timezone differences. Posting at "8 PM" in the wrong timezone means your Reel drops at 5 PM or 11 PM instead.
3. Using Low-Quality Exports
Reels compressed through multiple edits look blurry. Export at highest quality from your editing app:
- Resolution: 1080x1920 (9:16 ratio)
- Frame rate: 30 FPS minimum
- Bitrate: High quality
- Format: MP4 (H.264 codec)
4. Not Customizing Captions for Each Platform
If you're cross-posting to TikTok, YouTube Shorts, or Facebook, customize:
- Instagram: 3-5 hashtags, conversational tone
- TikTok: Short caption, trending hashtags
- YouTube Shorts: SEO-optimized title
- Facebook: Community-first tone
5. Forgetting to Add Trending Audio
Scheduled Reels uploaded from desktop can't access Instagram's trending audio library. Workaround:
- Edit your Reel with trending audio in the Instagram app
- Export the video (audio is baked in)
- Upload to your scheduler
Or use original audio (your voice or royalty-free music).
6. Using Generic Cover Images
Auto-selected covers often look unprofessional. Spend 2 minutes per Reel to:
- Choose the most eye-catching frame
- Or upload a custom branded cover
Troubleshooting: Why My Scheduled Reel Didn't Post
If your scheduled Instagram Reel didn't publish at the scheduled time, here are the most common issues and fixes:
Issue 1: Account Not Linked to Facebook Page
Problem: Meta Business Suite requires your Instagram account to be linked to a Facebook Page.
Solution:
- Go to your Facebook Page Settings
- Navigate to "Instagram" section
- Click "Connect Account" and follow prompts
- Ensure you have admin access to both accounts
Issue 2: Video Not 9:16 Ratio
Problem: Instagram Reels must be vertical (9:16 aspect ratio). Horizontal or square videos won't schedule as Reels.
Solution:
- Export videos at 1080x1920 resolution
- Use a video editor to convert landscape to portrait
- Add black bars or blur background if needed (though native vertical is best)
- Verify aspect ratio before uploading
Issue 3: Token/Permission Expired
Problem: Your Instagram connection to the scheduling tool expired (common with third-party tools after 60-90 days).
Solution:
- Go to your scheduler's settings
- Find "Connected Accounts" or "Integrations"
- Click "Reconnect Instagram"
- Re-authorize permissions
- Re-schedule your Reels
Issue 4: Time Zone Mismatch
Problem: Your scheduler is set to a different timezone than you intended.
Solution:
- Check your profile timezone settings
- Verify scheduler shows correct local time
- Use "audience timezone" if available
- Double-check AM/PM when scheduling
Issue 5: Music/Audio Limitations
Problem: Scheduled Reels uploaded from desktop can't include Instagram's trending audio library.
Solution:
- Edit Reel with audio in Instagram app first
- Export the video with audio baked in
- Upload to scheduler as a complete video file
Issue 6: File Size Too Large
Problem: Video file exceeds Instagram's limits (100MB for most videos).
Solution:
- Compress video using Handbrake, CapCut, or Adobe Media Encoder
- Reduce bitrate while maintaining quality
- Trim video to under 90 seconds
- Export at 1080p (not 4K)
Issue 7: Caption Length Exceeded
Problem: Instagram captions have a 2,200 character limit.
Solution:
- Shorten your caption
- Move extra content to first comment
- Use first-comment scheduling if your tool supports it
Issue 8: Reel Doesn't Meet Instagram's Specs
Problem: Video format, length, or resolution not supported.
Required specs:
- Aspect ratio: 9:16 (vertical)
- Resolution: 1080x1920 minimum
- Length: 3 seconds to 90 seconds
- Format: MP4 or MOV
- File size: Under 100MB
- Frame rate: 23-60 FPS
Still having issues? Check Instagram's Help Center or contact your scheduling tool's support.
Getting Started Checklist (10 Steps)
Ready to start batch scheduling Instagram Reels? Follow this checklist:
- Switch to Instagram Business or Creator account — Required for Meta Business Suite and analytics
- Link Instagram to a Facebook Page — Required for Meta Business Suite access
- Choose your scheduling tool — Meta Business Suite (free, basic) or third-party (PostEverywhere, Buffer, Later)
- Audit your Reel content pillars — Define 3-5 recurring Reel themes (tips, BTS, trends, educational, promotional)
- Film 8-15 Reels in one batch — Set aside 1-2 hours for filming vertical videos
- Edit with hooks in first 2 seconds — Grab attention immediately to avoid swipes
- Create branded cover images — Design a Canva template for cohesive grid aesthetics
- Write caption templates — Save 3-5 reusable templates for faster scheduling
- Upload all Reels to your scheduler — Batch upload or one-by-one depending on tool
- Schedule at optimal times — Use 7-9 PM as primary time, then test 3-5 windows for 2 weeks
Pro tip: Start with 5 Reels scheduled over 1 week. Once comfortable, scale to 10-15 Reels per 2 weeks.
FAQs: Scheduling Instagram Reels
Can you schedule Instagram Reels?
Yes. You can schedule Reels in Meta Business Suite or via third-party tools like PostEverywhere. Upload a 9:16 video (≤90s), add caption/cover, and set a time. Note: You can't access Instagram's trending audio library when scheduling—edit Reels with audio in the app first, then export and upload.
How do I schedule Instagram Reels from desktop?
Use Meta Business Suite on desktop: Create post → Instagram → Select "Reel" → upload vertical video (9:16) → add caption/hashtags/cover → Schedule → select date/time → confirm. It's free but requires linking Instagram to a Facebook Page. Third-party tools add batch upload and cross-posting to TikTok, YouTube Shorts, and Facebook.
Can I batch schedule Instagram Reels?
Not natively. Meta Business Suite requires you to schedule each Reel individually. Third-party tools like PostEverywhere let you batch upload 10-20 Reels at once and schedule them in one session, saving hours.
How far in advance can I schedule Instagram Reels?
Meta Business Suite: up to 75 days ahead. Third-party tools: 1-6 months ahead (but we recommend staying within 2-3 weeks for trend relevance and timely content).
Does scheduling Instagram Reels hurt engagement?
No. Scheduled Reels perform the same as manually posted content. Instagram's algorithm doesn't penalize scheduling—it only cares about engagement (likes, comments, shares, saves) and watch time. Scheduling actually helps by ensuring you post at optimal times.
What's the best time to post Instagram Reels?
Peak time is 7-9 PM in your audience's timezone (people watch Reels before bed). Also strong: 7-9 AM (morning scroll) and 12-1 PM (lunch break). Use Instagram Insights to check when your specific audience is most active, then test 3-5 time slots over 2 weeks. See our timing guide for complete strategies.
Can I schedule Reels to multiple platforms at once?
Yes! Third-party schedulers like PostEverywhere let you upload once and auto-post to Instagram Reels, TikTok, YouTube Shorts, and Facebook Reels simultaneously. This saves hours and maximizes reach without duplicate work. Our broader cross-posting guide for social media covers when to mirror content versus customizing per platform, and our TikTok-to-Instagram-Reels walkthrough shows how to repurpose without the watermark penalty.
How often should I post Reels on Instagram?
Aim for 3-5 Reels per week. According to Social Media Examiner, consistent posting (3-5x/week) outperforms sporadic posting (daily for 3 days, then nothing for 2 weeks).
Do I need a Facebook Page to schedule Instagram Reels?
For Meta Business Suite: Yes, you must link your Instagram to a Facebook Page. For third-party tools: No, you can connect directly to your Instagram account without a Facebook Page requirement.
Can I edit or delete a scheduled Reel?
Yes. In Meta Business Suite, go to Content Library → Scheduled posts → Click the Reel → Edit or Delete. Third-party tools have similar interfaces for managing scheduled content. You can modify captions, change posting times, or cancel scheduled Reels anytime before they publish.
Why didn't my scheduled Reel post?
Common issues: account not linked to a Page, video not 9:16 ratio, token/permission expired, timezone mismatch, file size too large, or music limitations. Check your connections, verify video specs (1080x1920, ≤90s, ≤100MB), and reconnect if needed. See our Troubleshooting section above.
Can I schedule Reels with trending audio?
Not directly. Instagram's trending audio library is only available in-app. Workaround: Edit your Reel with trending audio in the Instagram app, export it (audio is baked into the video), then upload to your scheduler. The audio will publish with the Reel.
How do I create custom cover images for scheduled Reels?
Most schedulers let you upload a custom cover image (1080x1920) when scheduling. Design branded covers in Canva, Photoshop, or Figma using consistent fonts, colors, and layouts. Covers boost grid aesthetics and click-through rates. See our Cover Image Best Practices section above.
References (Authoritative Sources)
Platform Documentation:
- Instagram Help Center - Scheduling Posts
- Meta Business Suite Guide
- Instagram Business Blog - Reels Best Practices
- TikTok Creator Portal
- YouTube Shorts Guidelines
Industry Research & Statistics:
- Sprout Social: Social Media Statistics
- CoSchedule: Best Times to Post on Social Media
- Social Media Examiner: How Often to Post
- Influencer Marketing Hub: Best Time to Post on Instagram
- HubSpot: Video Marketing Statistics
Next Steps
Ready to schedule Instagram Reels and save 5-10 hours every week?
- Compare tools: See the best social media scheduling tools to find your perfect match
- Free option: Use Meta Business Suite for basic Reel scheduling (desktop-only, one Reel at a time)
- Advanced option: Try PostEverywhere's Instagram Reels scheduler for batch upload, mobile + desktop scheduling, and cross-platform posting to TikTok, YouTube Shorts, and Facebook Reels
- AI-powered: Use AI social media scheduler to auto-generate Reel captions, suggest trending hashtags, and recommend viral hooks
- Verify link previews: Check how your Reel links appear with our free OG image checker before sharing
- For feed posts, carousels, and Stories: See our guide How to Schedule Instagram Posts
- Learn more: How to post content across all social media platforms at once to maximize reach
- Get started: See pricing to start your 7-day free trial
Pro tip: The creators who win on Instagram aren't the ones who film daily—they're the ones who batch-create Reels, schedule smart, and stay consistent without burning out. Master Reel scheduling, and you'll have more time for the creative work that actually grows your audience.
Last updated: November 20, 2025 — Reviewed by Jamie Partridge, Founder of PostEverywhere
Founder & CEO of PostEverywhere. Writing about social media strategy, publishing workflows, and analytics that help brands grow faster.